Yogurt is simply milk which has been fermented by a cocktail of lactic bacteria. Yogurt cultures prefer temperatures near 115°F, much warmer than mesophilic cultures which prefer the 85-90°F range. There is some overlap in bacterial species between thermophilic cheese cultures and yogurt culture, and in a pinch you can use yogurt in place of thermophilic culture to make cheese, though the results will not be identical. Technical facts aside, what this simply means is that if you heat milk to 115°F, add some commercial yogurt with active cultures, and maintain the temperature for 12-16 hours you can turn 8 oz of yogurt into 2 quarts overnight.
In Alton Brown's Good Eats episode "Good Milk Gone Bad," Alton describes his mad scientist method of making yogurt which involves a clear container, a heating pad, and a trash can (he demonstrates this and other gadgets on a spot on David Letterman).

So here is my recommended method for making yogurt at home, using easy to find items and no mad scientist contraptions. This method uses the microwave to heat the milk, which is my favorite method since it is easy to control and does not dirty a saucepan, but you can also heat the milk carefully on the stove if you like. If you can use more yogurt, mix up two jars instead of just one.
Homemade Yogurt
Equipment:
- 1 clean one quart mason jar with lid (either standard canning lid or a white plastic freezer lid)
- Dairy thermometer or kitchen thermometer in the 70-120°F range
- Metal spoon that fits into jar and reaches to bottom
- 1 small mixing bowl in which you can place the thermometer and spoon when you are not using them.
- Picnic cooler large enough to hold the jar standing up
Ingredients:
- 4 ounces of yogurt labeled as containing active cultures (you can also use yogurt from a previous batch), or 1 packet of freeze dried yogurt starter
- 1 quart of milk (2% or whole works well)
- 1/2 cup of dried milk powder
- Optional: 2 tablespoons of honey
- Optional: 1 teaspoon vanilla
Method:
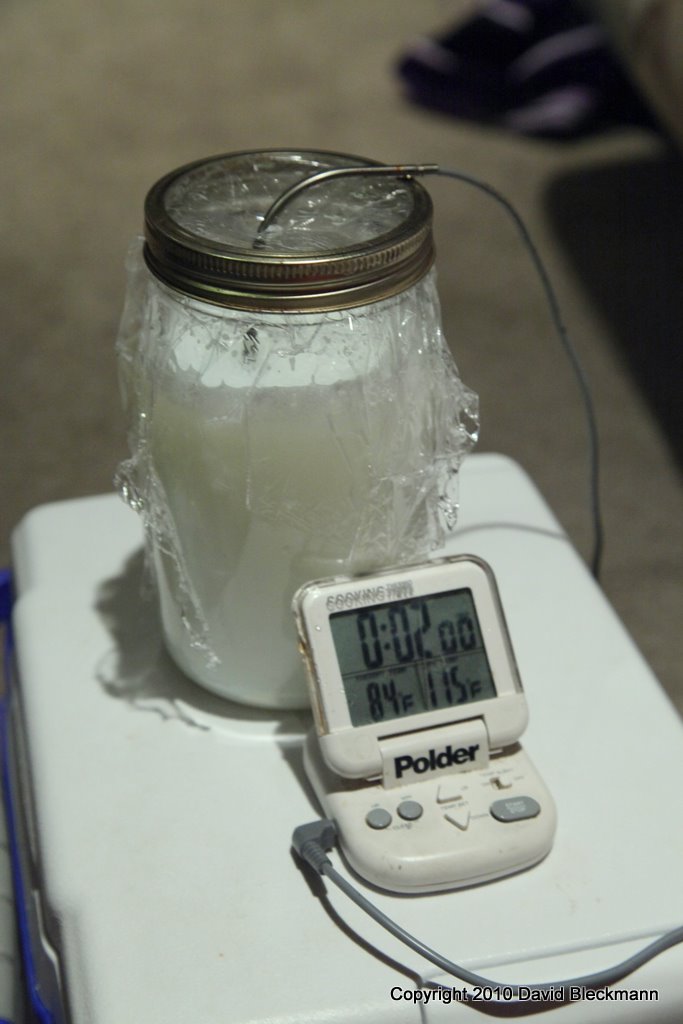
All equipment should be clean before starting.Sterilize the jar and lid by filling the jar to the rim boiling water and putting on the lid. Being careful not to burn yourself, open the jar and sterilize the spoon placing it in jar for 2 minutes. Sterilize the mixing bowl and thermometer by filling the bowl with boiling water, running the water over the probe of the thermometer while filling the bowl. After 2 minutes, pour out the jar and the bowl. Set the spoon and thermometer in the bowl when you are not using them so they do not get contaminated.
Add milk to the jar until it is about 3/4 of the way full. Place jar in microwave and heat on high power for 1 minute, then remove, stir with spoon and check the temperature with thermometer. Return to microwave and heat again for 20 seconds, then stir and check temperature again. Repeat until the milk is 120°F. Place lid on jar.
Add dry milk and stir. Add the yogurt or starter and stir. Add the honey and vanilla, if using, for a sweeter yogurt.
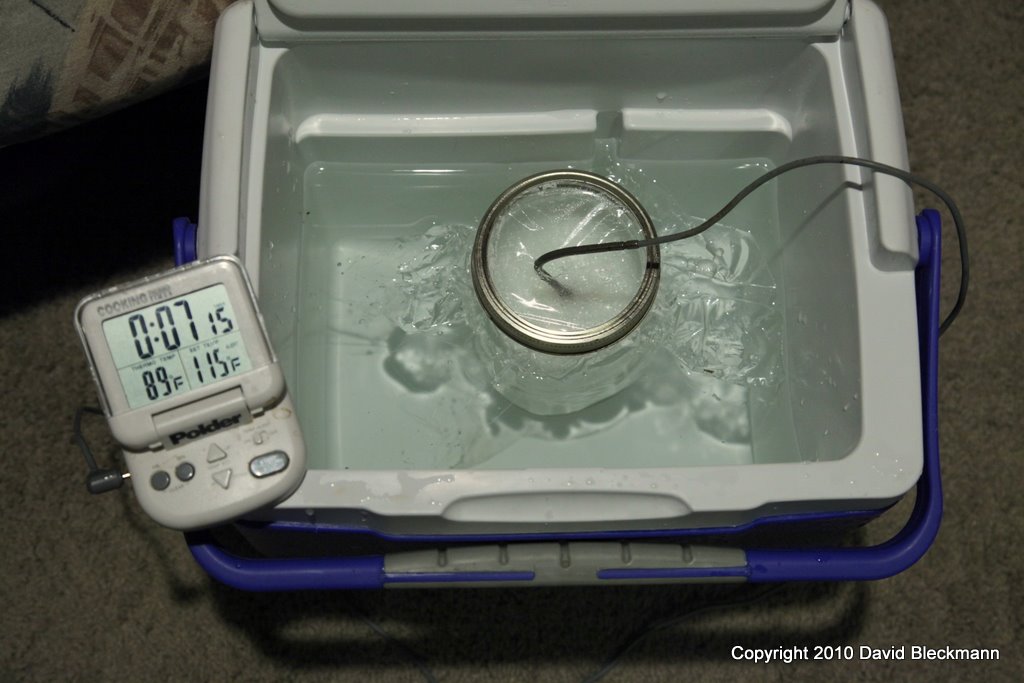
Fill picnic cooler with hot water from the faucet. As you are filling, insert the thermometer in the cooler and adjust faucet until the water in the cooler is 120°F. Fill the cooler until the water level is equal to the height of the milk in the jar when the jar is inserted. Do not let the water come over the top of the jar or let the jar fall over.
No comments:
Post a Comment